Go to Winery & Distillery section
BREWERIES
After successful account setup, you will be automatically taken to the Dashboard.
A video overview of the Dashboard can be found HERE.
How the Dashboard is Organized
The Dashboard is the main hub of the software. Here, you will find links to each part of TTB Tamer as well as due date reminders for your filing periods.
Visual Tour of the Dashboard
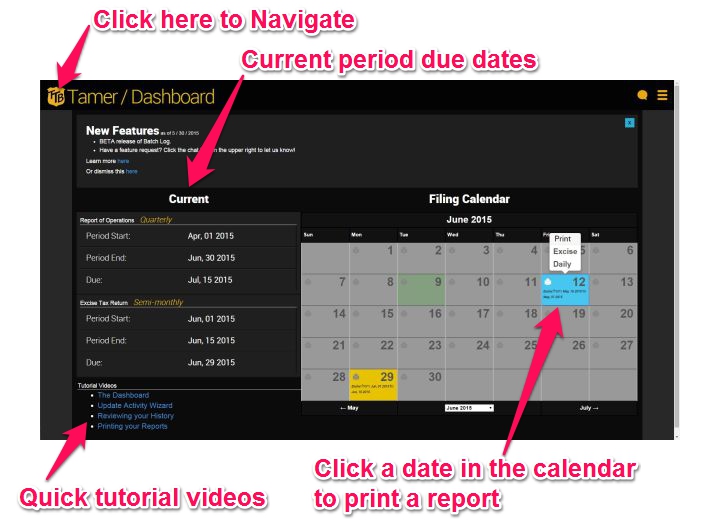
The Filing Calendar and Current Periods table show your current reporting due dates for your Report of Operations and Excise Tax Return.
You can use the calendar to look back and ahead at the past a future due dates. Only the dates for your filing schedule will be shown, based on the settings used when your brewery account was first set up.
Click on a date to quickly print a Daily Report, Operations Report, or Tax Return (if either of those are due).
Clicking on the shield in the upper left will open up the Navigation Bar.

Make Entries – The heart of TTB Tamer where all brewing activities are recorded.
Entry Log – Lists your activity entries in chronological order and displays specifics about your entries that were made from the Update Activity page..
Batches – Contains Batch History where your entries are organized by Batch number and Batch Blending where two or more different batches can be blended into a single batch.
Print Reports – Shows all past, current, and future report periods and allows creation of report PDF’s. Access to all of your reports is here.
State Report Helper – Calculates the monthly balances that are most commonly required for your state reports.
Manage Users – If you are the administrator of a multiple user account, you can manage your users here and control who else has administrative rights.
Help – Clicking on Help will bring you to this Users Guide
If you encounter a bug (they do happen, unfortunately) or if you have an idea for a new feature you would like to see in TTB Tamer, click on the Chat icon in the upper right and let us know. TTB Tamer has always been developed based on feedback from our users.

To change your TTB Tamer settings, click on the Setup link in the upper right corner of the screen. Here you will be able to find the brewery setup page that you visited the very first time your account was created. Make any changes you need and click Save at the bottom of the page. You can change any of your settings except for your Brewery TTB Number. Contact Us if you need to change your TTB Number.

To logout of the software, click the settings icon in the upper right side of the screen and select Logout.
Go to Winery & Distillery section
WINERIES & DISTILLERIES
Note: examples given below are winery specific, however the process for making a Process is the same for Distilleries.
After successful account setup, you will be allowed to navigate to the Dashboard by clicking the Dashboard link in the upper left of the screen.
A video overview of the Dashboard can be found HERE.
How the Dashboard is Organized
If you saved starting inventory amounts during your setup you will see inventory calculations on your dashboard. Additionally, when you make entries you will also see inventory calculations on the dashboard.
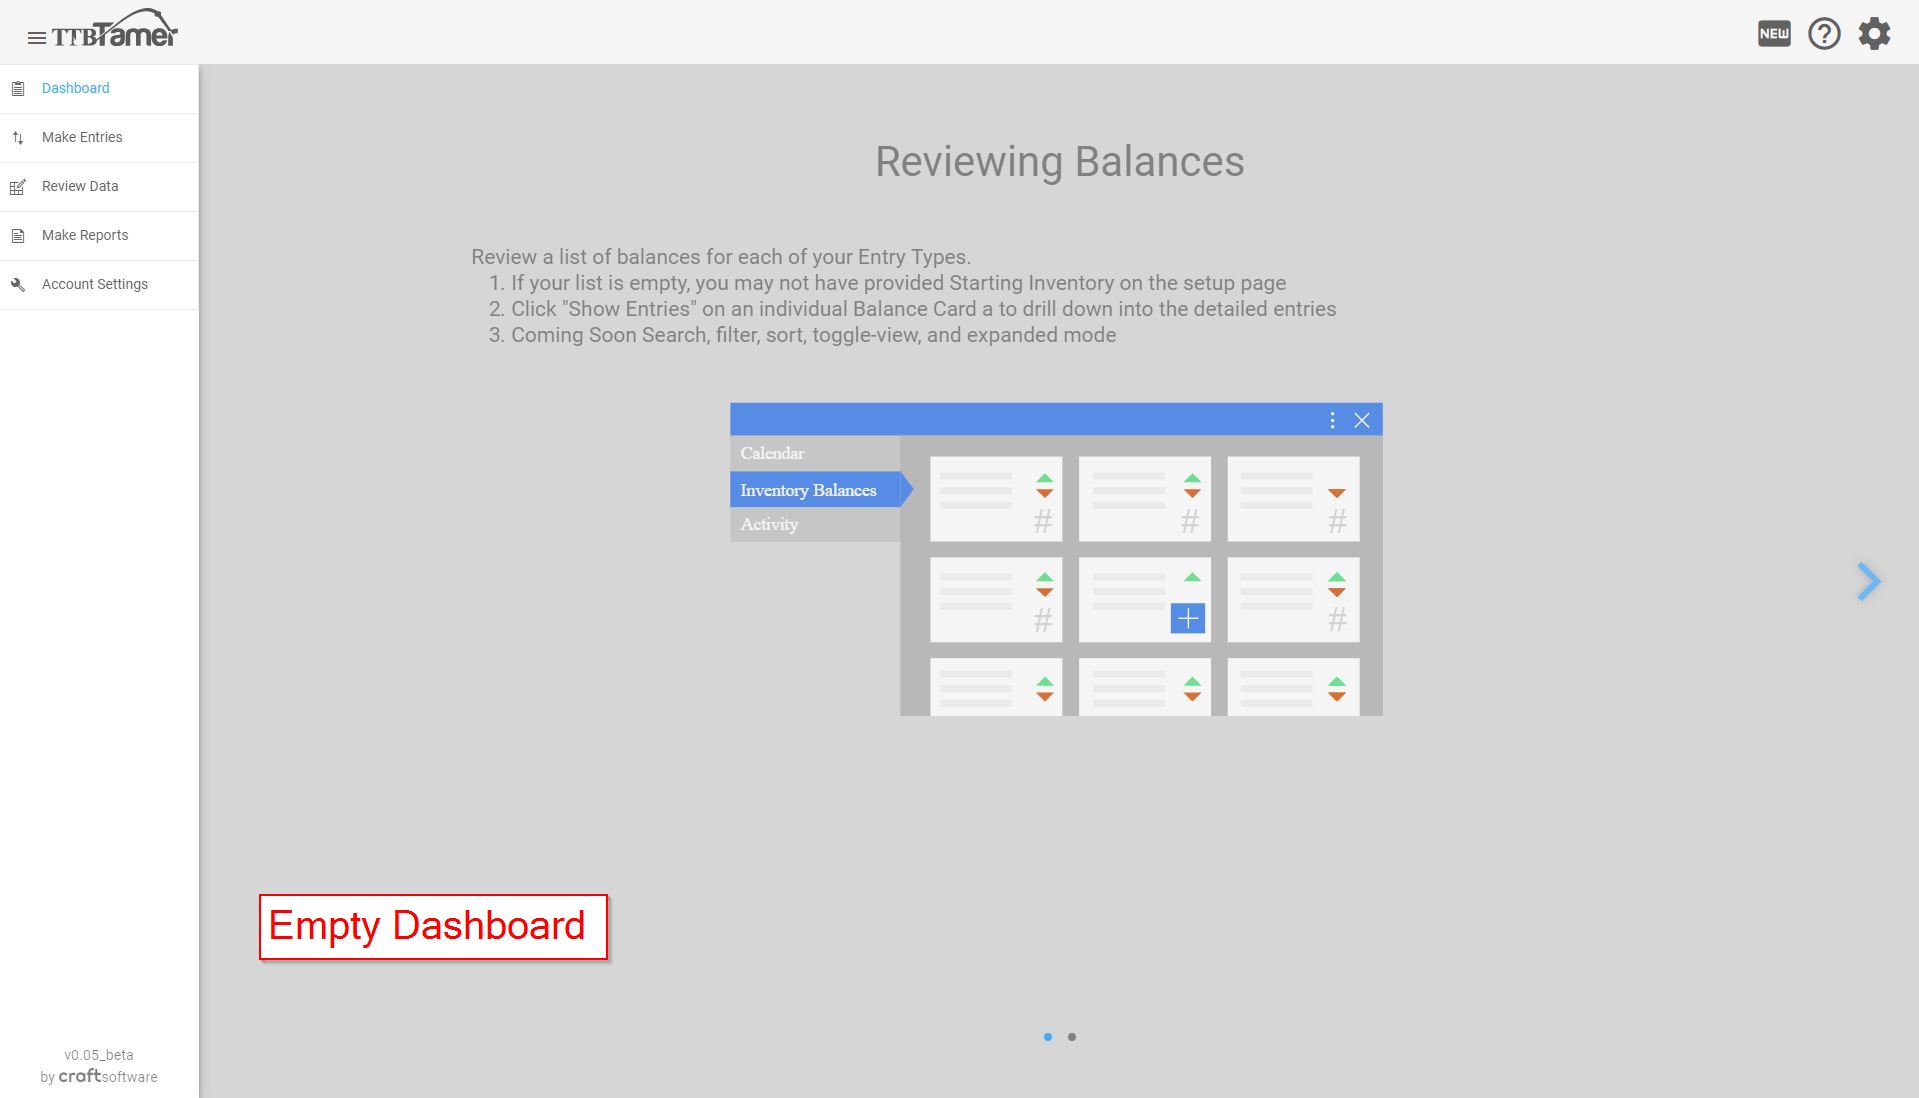
If you did not save any starting inventory amounts and you have not yet made any entries that would affect your inventories, then your dashboard will be empty with a background explaining that the inventory calculations will start to show up as you use TTB Tamer.

How to use the Inventory Cards on the Dashboard
The inventory cards show how your starting amounts and the additions / removals to inventory are adding together to give you your final inventory balance.
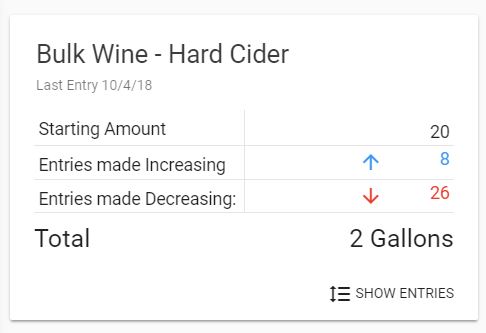
To drill down further into the numbers, click on the button that says “Show Entries” and you’ll be taken to the Entry Log page, with the appropriate filters applied, to show you the collection of entries that affect this inventory.
Navigation
You can navigate through the app using the links along the left side of the screen as well as the “New”, “Question”, and “Gear” icons in the upper right corner of the screen. NOTE: these navigation links are available on all screens inside the app, not just the dashboard.
To make more room on the screen for other tasks, the navigation panel can be collapsed by clicking the 3 horizontal lines to the left of the TTB Tamer logo (aka, the “hamburger icon”). Some pages will automatically collapse the navigation panel. To see it again, click on the 3 lines, this time they’ll be vertical, and the panel will slide back out.
As of the latest time this doc was updated, the available main navigation links are:
Dashboard – The Dashboard is the first screen that you’re shown after you login. Inventory cards, assuming you’ve made entries and have inventories entered into TTB Tamer, take up the majority of the screen.
Make Entries – Making entries is your main task inside of TTB Tamer. To easily make entries, first create and save a process that mimics how your operations take place (i.e. fermentation, packaging, etc). Then make entries using that process.
Fermenting Estimates – Wineries Only Wineries are required to give an estimate of what is still currently fermenting at the end of every reporting period.
Quarterly Inventory – Distilleries Only Distilleries that are permitted for distilling/production operations are required to take and report a physical inventory at the end of every monthly reporting period.
Review Data – After you’ve made entries you should occasionally review them. You can find two main ways to do that here, use the Entry Log or Batch Accounting. You can also edit the batches you’ve created and split/combine batches in this location.
Make Reports – Your TTB operations and excise tax reports can be generated here, as well as daily records and custom metrics to help with state reporting.
Account Settings – This provides a quick link to your account settings that were entered when your account was first set up. You can also get to the Account Settings page by clicking on the “Gear” icon and then “Account Settings”.
“NEW” – Click the “New” icon in the upper right to see what we’ve been working on and new features deployed to the app since the last time you’ve logged in.
“QUESTION” – Click the “Question” icon to see menu of help options such as Tutorial Videos, User Guide links, and ways to contact us if you still have questions.
“Gear” – Click the “Gear” icon to pull up additional links for Account Settings, managing your subscription and payment method, changing your password, managing additional users, or to logout of the app.