Go to Winery & Distillery section
BREWERIES
The Batch History will show all of your entries categorized by batch number, assuming you entered a batch number when the entry was made.
If a batch number was not entered the entry will not show up in Batch History.
After beer is produced, transfers to bulk and then removals for sale and consumption will eventually reduce the inventory of the batch to zero. This is essentially what the Batch History is used for and is very useful for making loss entries and reconciling your inventory, what we like to call ‘zeroing out’ your batches.
Entries are organized by Batch Number and inventory totals are tallied for Cellar, Racking Bulk, Racked Kegs, Bottling Bulk, and Bottled Cases.

As beer moves through the five categories the calculated amounts will eventually equal zero as the batch is sold and consumed. You can easily see if any additional losses need to be entered to ‘zero out’ the batch or if you have any lingering amounts of beer showing in your inventory that don’t actually exist.
On the Batch History page, filter for a specific batch using the batch filter at the top left of the page. Click on the orange icon to expand the batch and see each of the individual entries made.
You can edit your entries in the Batch History directly by clicking on the amount shown, making the edit, and the clicking the Save button at the top of the page. Entries can also be deleted on this page. Like mentioned before, please be careful when deleting entries as they can not be retrieved once deleted.
Note: All entries, regardless of their target date (past, current, or future) will show in the Batch History and be used to calculate inventory on this page.
See “Making Corrections to Entries” for more information.
Go to Winery & Distillery section
WINERIES & DISTILLERIES
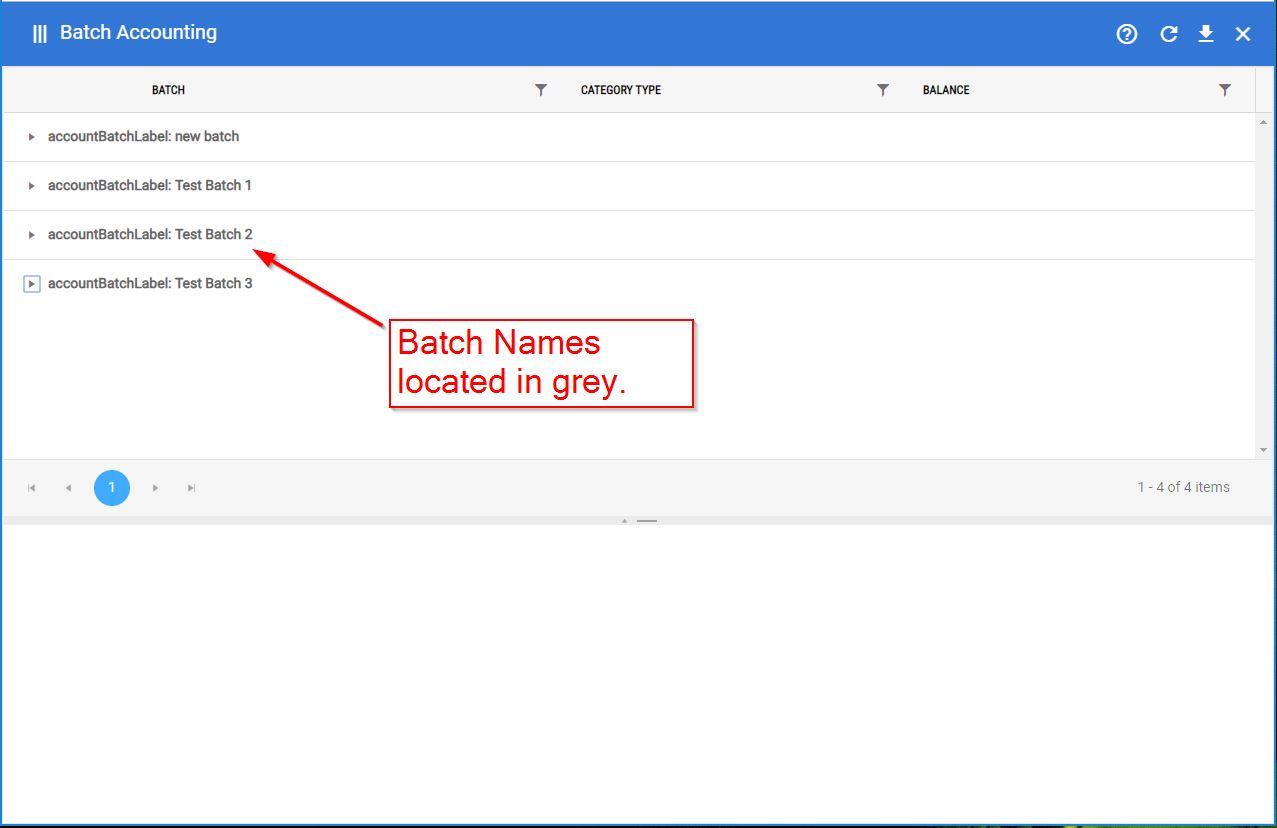
The Batch Accounting page will organize all of your entries by batch, allow you to see the current inventory for the batch, and make edits to entries in order to ‘zero-out’ your inventory.
If a batch number was not entered when making the entry, the entry will not show up in Batch Accounting.
The page is split into 2 halves. The top half will list all of the batches and the types of inventory associated with the batch, and the bottom half will show the individual entries that make up your inventory.
To get started, first find the batch you want to look at. You can also sort and filter the column headings to find something specific (eg. filtering the balance column to see all inventories that are negative might be helpful).
Next, expand the batch name if it isn’t already to see all of the types of inventory that currently exist under that batch name.
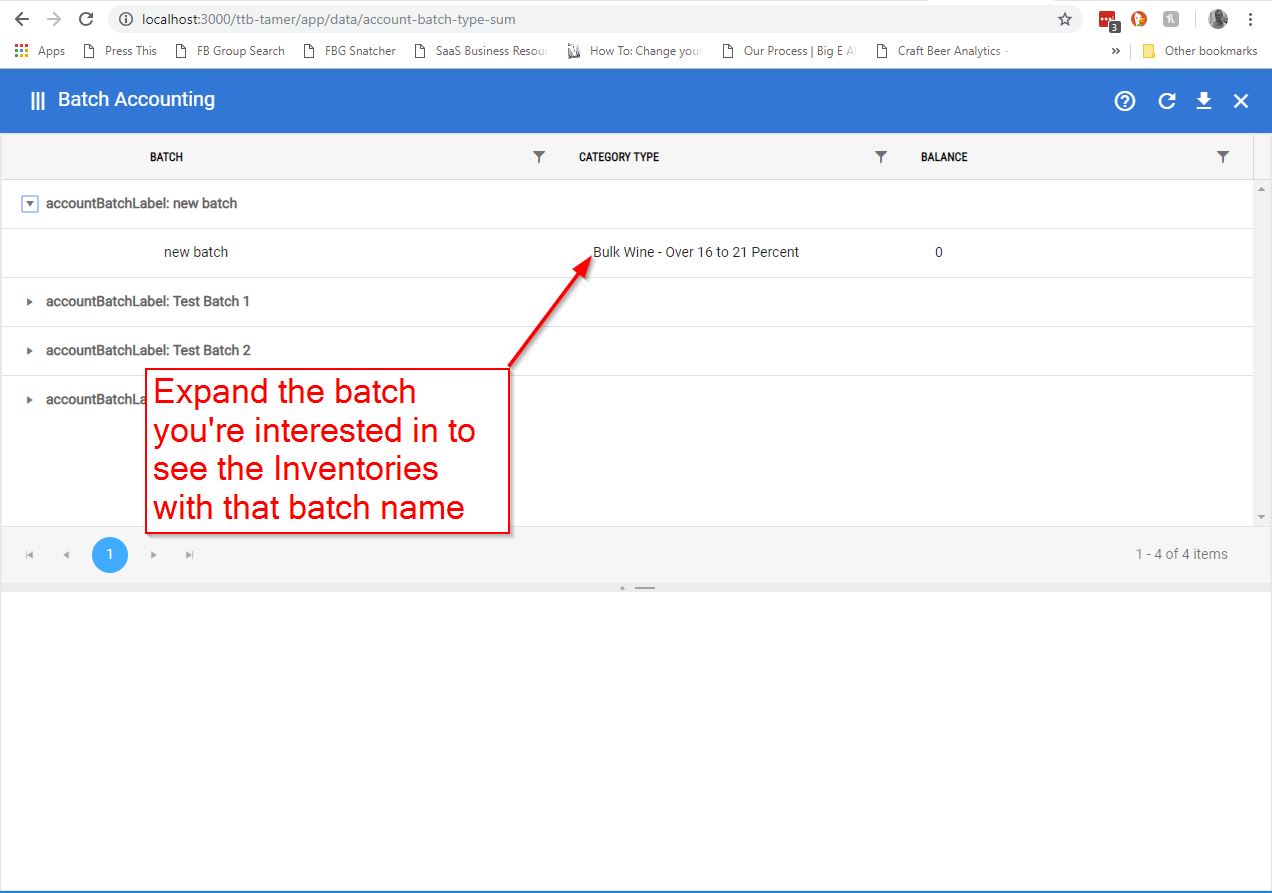
The inventory balance will show under the ‘Balance’ column. Note: negative balances are typically good indicators that entries were made incorrectly, or that some entries that should have been made, weren’t.
Last, click on the inventory name and the entries that make up that inventory will appear in the bottom half of the window.
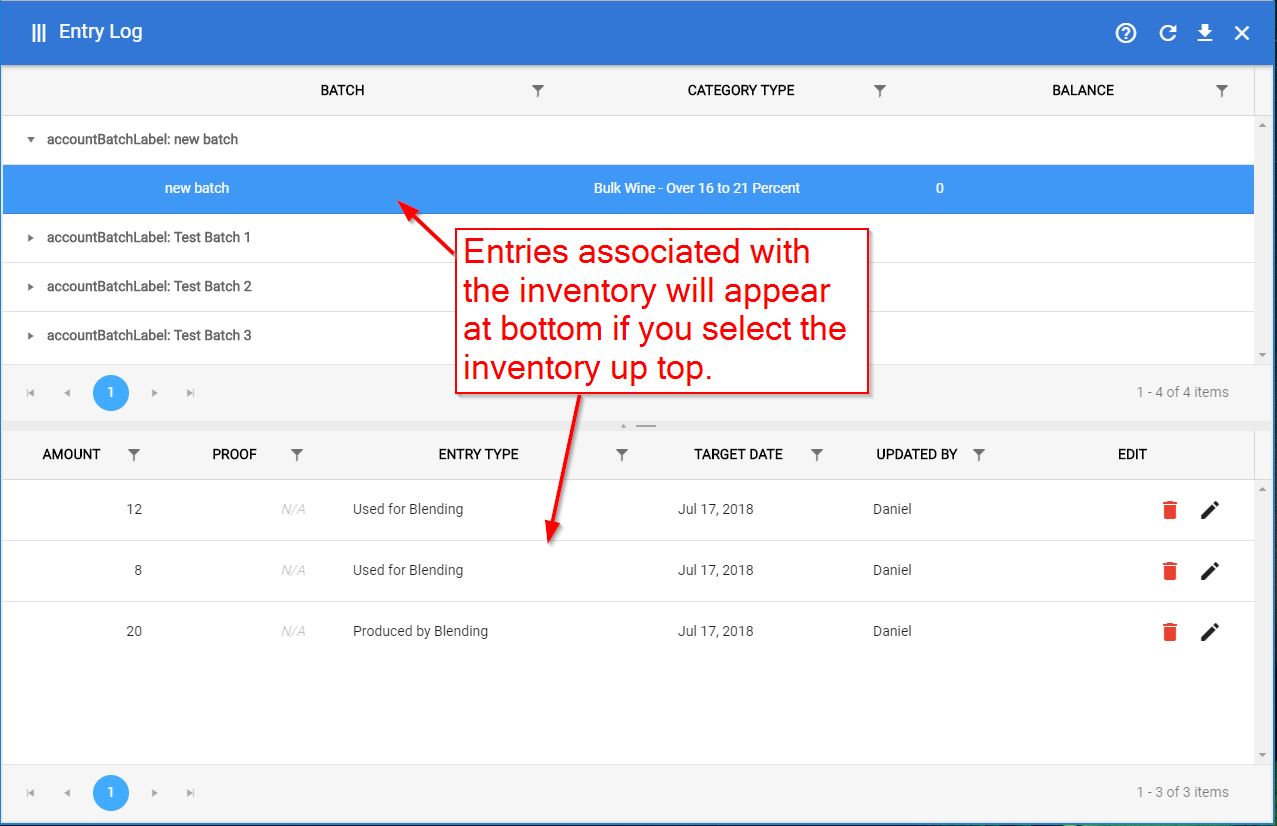
You can then make edits to the entries in the lower half of the screen to make adjustments to your overall inventory balance, as needed.